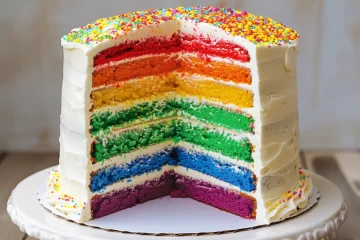
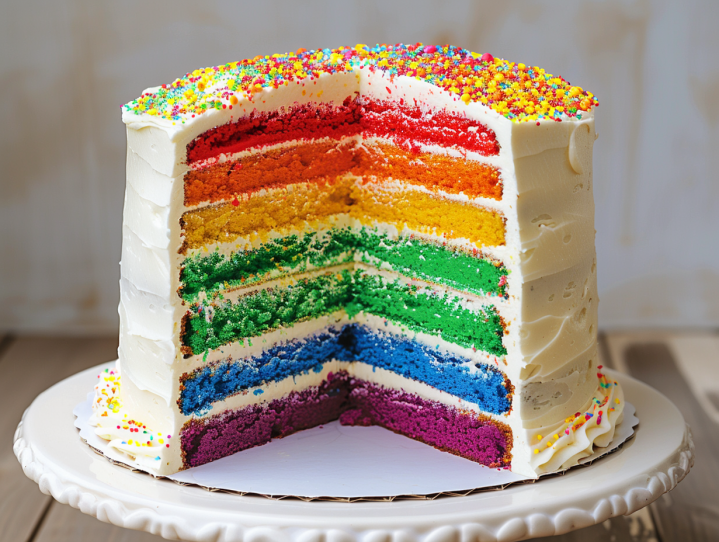
Create a Birthday Masterpiece with Our Rainbow Layer Cake
Is there a more joyful occasion than a child’s birthday party? The balloons, the games, and, of course, the cake! Why not dazzle your little ones and friends this year with something spectacularly vibrant—a Rainbow Layer Cake? Not just any cake, this multi-layered wonder combines the eye-popping allure of rainbow colors with the timeless taste of rich, creamy cake, making it the perfect centerpiece for your celebration. In this guide, we’ll walk you through crafting this colorful masterpiece, offer customization tips, and explore the delightful history behind birthday cakes.
Table of Contents
Why You’ll Love This Rainbow Layer Cake
- Visually Stunning: This cake transforms a table into a spectacle with its bright, cheerful layers.
- Utterly Delicious: With its moist base and decadent frosting, it’s as tasty as it is beautiful.
- Perfectly Customizable: Tailor the cake to fit any theme or preference, making it truly yours.
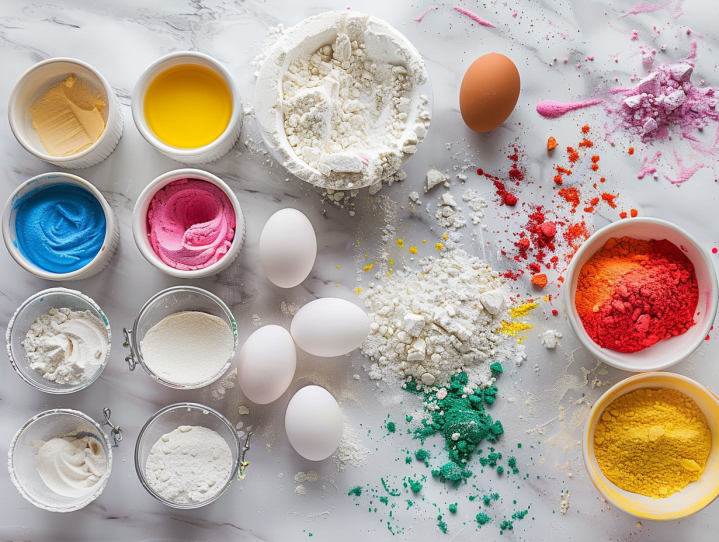
Ingredients Overview
Let’s gather what we need for this whimsical creation:
- Basic Ingredients: Flour, sugar, eggs, and butter provide the foundation.
- Color Magic: Food coloring turns plain batter into a rainbow.
- Creamy Frosting: Vanilla and heavy cream blend into a silky frosting that ties all the flavors together.
How Kids Can Get Involved with Making the Rainbow Layer Cake
Getting kids involved in the kitchen is not only fun but also educational. Here are some safe ways they can help:
- Mixing the Batter: They’ll love measuring and combining the ingredients.
- Choosing Colors: Let them pick the colors for each layer, making it a truly personal cake.
- Decorating Fun: Kids can spread frosting and sprinkle on some magic with decorations.
Detailed Instructions: Crafting Your Cake
Step 1: Prep and Bake
- Prepare the Batter:
- Start by creaming together butter and sugar until fluffy.
- Beat in the eggs one at a time, then stir in the vanilla.
- Gradually mix in the dry ingredients alternated with milk until the batter is smooth.
- Color the Batter:
- Divide the batter evenly into separate bowls, one for each color of the rainbow.
- Add food coloring to each bowl to achieve desired shades, from deep violet to vibrant red.
- Bake Each Layer:
- Pour each colored batter into greased and floured round cake pans.
- Bake in a preheated oven at 350°F for about 15-20 minutes per layer, or until a toothpick comes out clean.
Step 2: Assemble and Frost
- Cool the Layers:
- Allow each cake layer to cool completely on a wire rack to prevent the frosting from melting when applied.
- Layer and Frost:
- Place the first layer on a cake stand and evenly spread a layer of frosting on top.
- Repeat this with all the layers, stacking them from violet up to red, spreading frosting between each.
- Final Touches:
- Once all the layers are stacked, frost the outside of the cake.
- Add sprinkles or edible glitter for that extra sparkle.
Storing Your Cake
- Refrigeration: Keep the cake refrigerated until party time to maintain its freshness and make slicing easier.
- Leftovers: Cover leftover cake and store in the refrigerator for up to 3 days.
FAQ: All Your Cake Queries Answered
Q: How can I make the cake layers ahead of time? A: Bake the layers, let them cool, and wrap them individually in plastic wrap. They can be refrigerated overnight or frozen for longer storage.
Q: How do I ensure my cake layers are even? A: Use a kitchen scale to weigh the batter for each layer, ensuring an equal amount in each pan.
Q: What are some fun variations for the cake flavors? A: Experiment with adding citrus zest or extracts to the batter to complement the vanilla base with subtle flavors.
Nutritional Insights
This treat is indeed indulgent. Here’s how you can manage the indulgence:
- Moderation is Key: Small servings ensure enjoyment without overindulgence.
- Balancing Act: Serve with a side of fruit to balance the sweetness.
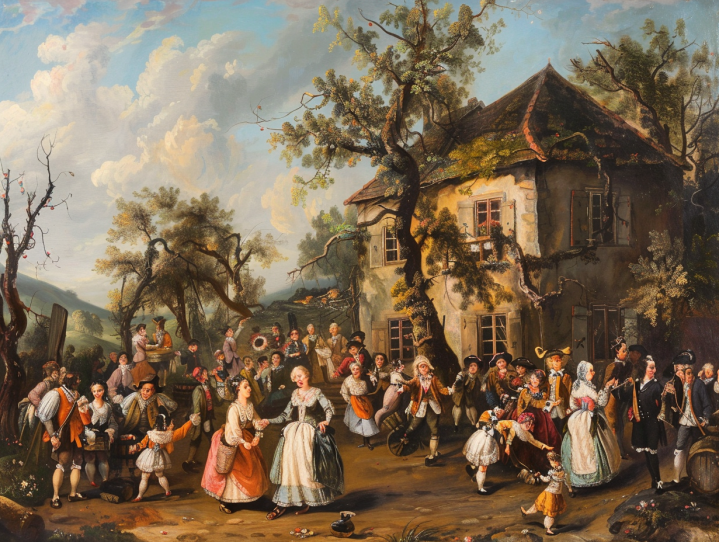
The Sweet History of Birthday Cakes
The tradition of birthday cakes dates back to ancient civilizations who celebrated with round cakes to symbolize the cycle of life. The modern birthday cake, however, took shape in 18th-century Germany, where candles were added to cakes to represent the light of life.
Myth Busting
Myth: Homemade cakes are too difficult and time-consuming. Fact: With preparation and simple steps, anyone can create a stunning homemade cake.
Encouraging Creativity in Kids
Encourage your young chefs to suggest additions or changes. Perhaps they have a favorite flavor or color they’d like to incorporate.
Complementary Foods
Pair this sweet delight with:
- Savory Snacks: Balance the sweetness with some savory finger foods.
- Coffee for the Adults: A cup of coffee complements the sweet vanilla flavor perfectly.
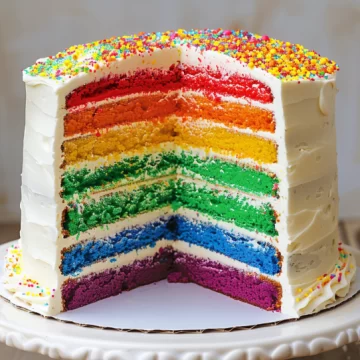
Conclusion: Making It Memorable
The Magical Rainbow Layer Cake is more than just a dessert; it’s a centerpiece that brings joy and delight to any birthday party. Dive into making this cake with enthusiasm, and watch as the bright colors and sweet flavors bring smiles to everyone’s faces. Enjoy the celebration of creativity, taste, and shared happiness that comes with baking from the heart. Happy baking and even happier celebrations!
Rainbow Layer Cake
Equipment
Equipment and Ingredient sections may contain affiliate links to items we use and love.
Ingredients
- 2 ½ cups This section may contain affiliate links to products we know and love.All-Purpose Flour
- 2 cups This section may contain affiliate links to products we know and love.Sugar
- 1 tablespoon This section may contain affiliate links to products we know and love.Baking Powder
- ½ teaspoon This section may contain affiliate links to products we know and love.Salt
- 1 cup This section may contain affiliate links to products we know and love.Butter, softened
- 4 This section may contain affiliate links to products we know and love.Eggs
- 1 cup This section may contain affiliate links to products we know and love.Milk
- 2 teaspoons This section may contain affiliate links to products we know and love.Vanilla Extract
- This section may contain affiliate links to products we know and love.Food Coloring, red, orange, yellow, green, blue, indigo, violet
For the frosting:
- 1½ cups This section may contain affiliate links to products we know and love.Butter, softened
- 4 cups This section may contain affiliate links to products we know and love.Powdered Sugar
- 2 teaspoons This section may contain affiliate links to products we know and love.Vanilla Extract
- 2-4 tablespoons This section may contain affiliate links to products we know and love.Heavy Cream
- This section may contain affiliate links to products we know and love.Sprinkles for decorating
Instructions
Prepare Cake Batter:
- In a large bowl, whisk together flour, sugar, baking powder, and salt.
- Add butter, eggs, milk, and vanilla extract. Beat with an electric mixer until smooth.
Color the Batter:
- Divide the batter evenly into seven bowls. Color each bowl with a different food coloring to represent each rainbow color.
Bake the Layers:
- Grease and flour each cake pan. Pour the colored batter into the pans.
- Bake each layer at 350°F (175°C) for 15-20 minutes or until a toothpick inserted comes out clean.
- Cool cakes on a wire rack before assembly.
Prepare Frosting:
- Beat butter until creamy. Gradually add powdered sugar, vanilla extract, and heavy cream, continue beating until smooth and spreadable.
Assemble the Cake:
- Place the first layer on a cake stand. Spread frosting evenly over the top.
- Repeat with remaining layers, following the order of the rainbow.
- Frost the outside of the cake. Decorate with sprinkles.
Chill and Serve:
- Chill the cake for at least an hour before serving to set the frosting.
Notes
Color Variations: Use gel food coloring for more vibrant colors without altering the batter consistency.
Allergy-Friendly Version: Substitute gluten-free flour and use dairy-free alternatives for butter and milk if needed.
Nutrition
Kitchen Gear and Equipment We Use and Love
I just wanted to let you know that some of the links on this page are affiliate links. This means that if you click on these links and make a purchase, I may earn a small commission at no extra cost to you. Rest assured, I only recommend products and services that I personally use and love. Your support through these links helps me continue to create valuable content and keep this blog running. I appreciate your support!

Chefmaster Liqua-Gel Food Color, 10.5-Ounce, Super Red
$11.91 (as of June 26, 2024 19:12 GMT -04:00 - More infoProduct prices and availability are accurate as of the date/time indicated and are subject to change. Any price and availability information displayed on [relevant Amazon Site(s), as applicable] at the time of purchase will apply to the purchase of this product.)
Cuisinart 15pc Caskata Collection™ Stainless Steel Hollow Handle Cutlery Block Set, C77SS-15PKCA
$129.95 (as of June 23, 2024 18:06 GMT -04:00 - More infoProduct prices and availability are accurate as of the date/time indicated and are subject to change. Any price and availability information displayed on [relevant Amazon Site(s), as applicable] at the time of purchase will apply to the purchase of this product.)
Nugget Countertop Ice Maker, Silonn Chewable Pellet Ice Machine with Self-Cleaning Function, 33lbs/24H, Portable Ice Makers for Home, Kitchen, Office, Green
$169.99 (as of June 25, 2024 19:12 GMT -04:00 - More infoProduct prices and availability are accurate as of the date/time indicated and are subject to change. Any price and availability information displayed on [relevant Amazon Site(s), as applicable] at the time of purchase will apply to the purchase of this product.)
Moforoco 6-Tier Over The Door Pantry Organizer, Pantry Organization and Storage, Black Hanging Basket Cabinet Door Wall Spice Rack Shelves, Home & Kitchen Laundry Room Bathroom Essentials accessories
$43.99 (as of June 23, 2024 18:06 GMT -04:00 - More infoProduct prices and availability are accurate as of the date/time indicated and are subject to change. Any price and availability information displayed on [relevant Amazon Site(s), as applicable] at the time of purchase will apply to the purchase of this product.)