Embarking on a Culinary Rainbow: Making Adventure Bread with Kids
In the quest to make cooking a fun, educational, and bonding activity for families, “Rainbow Adventure Bread” emerges as a vibrant contender. This isn’t just any bread; it’s a canvas for creativity, a lesson in colors and baking, and a delightful snack rolled into one. Whether it’s a rainy day, a sunny afternoon, or a quiet weekend, baking this bread can turn into an adventure that both kids and parents will cherish. Let’s dive into how you can make this multicolored masterpiece with your little helpers.
Table of Contents
The Concept: Colorful Creations in the Kitchen
The idea behind Rainbow Adventure Bread is simple yet captivating. By integrating a spectrum of food colors into bread dough, you can create a loaf that’s a treat for the taste buds and a feast for the eyes. It’s an excellent way to introduce children to the joys of baking while engaging their senses and sparking their imagination.
Gathering Your Rainbow for Rainbow Adventure Bread
Before embarking on this culinary journey, you’ll need to prepare. The adventure begins at the grocery store or your pantry, gathering all the necessary ingredients. Here’s what you’ll need:
- Basic Bread Ingredients: Flour, yeast, sugar, salt, and water.
- Food Coloring: A variety of colors to create your rainbow.
- A Pinch of Patience: Essential for baking with kids!
Step-by-Step: Crafting Your Culinary Rainbow
1. Mixing the Dough:
Start with the basics. Mix your flour, yeast, sugar, salt, and water according to your favorite bread recipe. This is a fantastic opportunity to teach kids about measurements and the role of each ingredient. Let them pour and mix under your guidance, feeling the texture change as the dough forms.
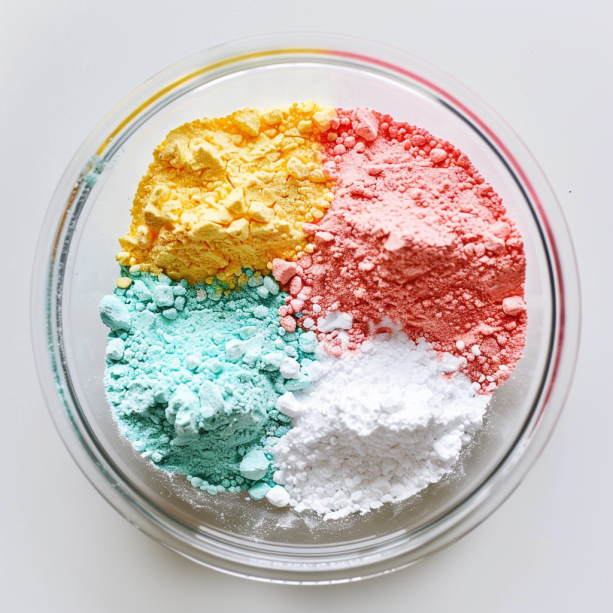
2. Dividing and Coloring:
Once your dough is ready, divide it into equal parts, assigning one for each color of your rainbow. Now, the real fun begins! Let the kids pick their colors and add food coloring to each dough section. Kneading the color into the dough is not only incredibly fun but also mesmerizing as the dough transforms.
3. Layering Your Rainbow:
After coloring, roll each piece into a log or a ball. Stack or arrange them next to each other, and gently roll or press together. This step is crucial, as it’s where the rainbow comes together. Kids will love seeing how the colors sit side by side, ready to swirl into each other.
4. The Magic of Baking:
As the bread bakes, the anticipation builds. This waiting period is an excellent time to talk about how yeast works, causing the bread to rise and giving it that soft, fluffy texture. The aroma filling the kitchen is just a hint of the magic happening inside the oven.
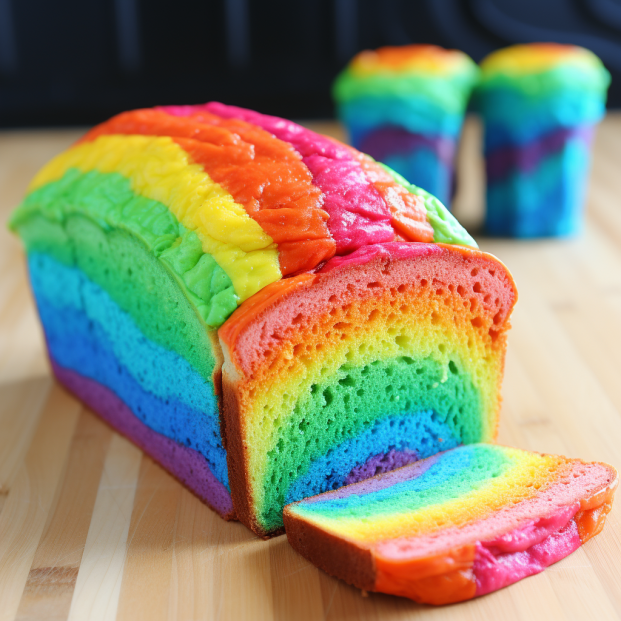
5. The Big Reveal:
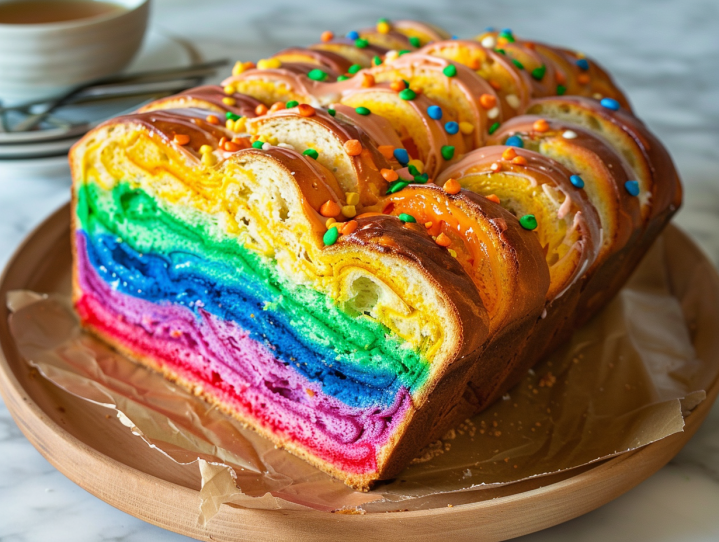
The moment of truth arrives as you take the bread out of the oven. Let it cool (the hardest part!) and then slice in to reveal the rainbow. Each slice is a surprise, with swirls and patterns unique to your loaf. The excitement in your kids’ eyes at this moment is the real reward.
Making It a Learning Experience
Baking Rainbow Adventure Bread isn’t just about the delicious outcome; it’s a journey filled with learning opportunities. Discuss the science behind baking, the way colors mix, and even the cultural significance of rainbows. Every step is a chance to engage and teach.
Beyond the Bread: A Mealtime Adventure
Don’t stop at baking! Use your Rainbow Adventure Bread to create vibrant sandwiches, toast, or even bread pudding. Involve the kids in deciding how to use the bread, turning mealtime into an extension of your adventure.
Customizing Your Adventure
The beauty of Rainbow Adventure Bread is in its versatility. Experiment with different color combinations for holidays, sports teams, or themes. Incorporating natural dyes like beet juice or spinach powder can add a healthy twist and a new layer of exploration.
The Takeaway: More Than Just Bread
By the end of your baking adventure, you’ll have more than just a loaf of bread. You’ll have memories, photos, and maybe a bit of a mess, but most importantly, you’ll have shared a priceless experience with your kids. These are the moments that nurture a love for cooking, a curiosity about the world, and the joy of spending time together.
So, the next time you’re looking for a family activity, why not take a trip through the culinary clouds with Rainbow Adventure Bread? It’s more than a recipe; it’s an adventure that’s as educational as it is delicious. Here’s to many more kitchen expeditions with your little chefs by your side!
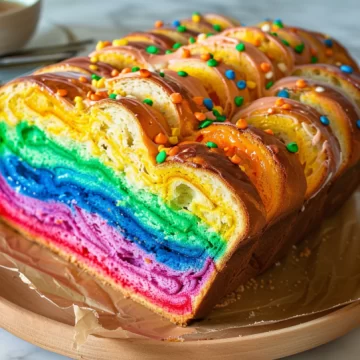
Rainbow Adventure Bread
Equipment
Equipment and Ingredient sections may contain affiliate links to items we use and love.
Ingredients
- 3 ½ cups This section may contain affiliate links to products we know and love.All-Purpose Flour
- 1 cup warm water, 100°F to 110°F
- 1 packet, 2¼ tsp active dry yeast
- 1 tbsp This section may contain affiliate links to products we know and love.Sugar
- 1 tsp This section may contain affiliate links to products we know and love.Salt
- 2 tbsp olive oil or melted unsalted butter
- This section may contain affiliate links to products we know and love.Food Coloring, red, blue, yellow, green, purple
Instructions
- Yeast Activation: In a small bowl, dissolve sugar in warm water. Sprinkle yeast over the water and let it sit for about 5 minutes, or until foamy.
- Dough Mix: In a large bowl, combine flour and salt. Create a well in the center and pour in the yeast mixture and olive oil. Mix until a dough forms.
- Knead the Dough: Transfer the dough to a floured surface and knead for about 10 minutes, or until smooth and elastic.
- Divide & Color: Divide the dough into five equal parts. Add a few drops of food coloring to each dough piece and knead individually until you get vibrant, consistent colors. Note: Wear gloves to prevent stained hands.
- First Rise: Place each colored dough in separate greased bowls, cover with a damp cloth, and let them rise for 1 hour or until doubled in size.
- Shape the Adventure: Take each dough piece, roll into logs, and place them side by side in a greased loaf tin. Swirl them together gently for the rainbow effect!
- Second Rise: Allow the dough to rise in the loaf tin for an additional 30 minutes.
- Bake the Magic: Preheat your oven to 375°F (190°C). Once risen, bake your Rainbow Adventure Bread for 25-30 minutes, or until golden brown and the bottom sounds hollow when tapped.
- Cool & Slice: Allow your bread to cool in the tin for 10 minutes before transferring to a wire rack. Once completely cool, slice and embark on your tasting adventure!
Notes
Nutrition
Kitchen Gear and Equipment We Use and Love
I just wanted to let you know that some of the links on this page are affiliate links. This means that if you click on these links and make a purchase, I may earn a small commission at no extra cost to you. Rest assured, I only recommend products and services that I personally use and love. Your support through these links helps me continue to create valuable content and keep this blog running. I appreciate your support!

Silonn Nugget Ice Maker Countertop, Pebble Ice Maker with Soft Chewable Ice, One-Click Operation Ice Machine with Self-Cleaning, 33lbs/24H for Home,Kitchen,Office
$199.99 (as of June 29, 2024 19:37 GMT -04:00 - More infoProduct prices and availability are accurate as of the date/time indicated and are subject to change. Any price and availability information displayed on [relevant Amazon Site(s), as applicable] at the time of purchase will apply to the purchase of this product.)
EUHOMY Nugget Ice Maker Countertop with Handle, Ready in 6 Mins, 34lbs/24H, Removable Top Cover, Auto-Cleaning, Portable Sonic Ice Maker with Basket and Scoop, for Home/Party/RV/Camping. (Black)
$189.99 (as of June 29, 2024 19:37 GMT -04:00 - More infoProduct prices and availability are accurate as of the date/time indicated and are subject to change. Any price and availability information displayed on [relevant Amazon Site(s), as applicable] at the time of purchase will apply to the purchase of this product.)
Gorilla Grip Garlic Press and Peel Set, Heavy Duty Mincer Tool, Easily Mince and Crush Garlics, Ginger, Nuts, Seeds, Large Ergonomic Handle, Peeler Included for Peeling Cloves, Kitchen Gadgets, Black
$9.49 (as of June 28, 2024 19:26 GMT -04:00 - More infoProduct prices and availability are accurate as of the date/time indicated and are subject to change. Any price and availability information displayed on [relevant Amazon Site(s), as applicable] at the time of purchase will apply to the purchase of this product.)
Caraway Nonstick Ceramic Bakeware Set (11 Pieces) - Baking Sheets, Assorted Baking Pans, Cooling Rack, & Storage - Aluminized Steel Body - Non Toxic, PTFE & PFOA Free - Black
$595.00 (as of June 28, 2024 19:26 GMT -04:00 - More infoProduct prices and availability are accurate as of the date/time indicated and are subject to change. Any price and availability information displayed on [relevant Amazon Site(s), as applicable] at the time of purchase will apply to the purchase of this product.)