A Sweet Spell in the Kitchen: Creating Milk Chocolate Fudge
Welcome, magical chefs and tiny kitchen wizards! Today, we’re stepping into a world where chocolate meets enchantment in the form of our delectable Milk Chocolate Fudge. This isn’t just any fudge; it’s a creamy, dreamy concoction that brings families together and sprinkles a little joy into our lives. So, gather your little ones, roll up your sleeves, and let’s dive into a recipe that’s sure to fill your kitchen with laughter, fun, and a delicious aroma.
Table of Contents
Setting the Stage for Milk Chocolate Fudge
First things first, let’s create an atmosphere that Merlin himself would be proud of. Decorate your kitchen with some whimsical touches – think twinkling lights, colorful aprons, and even a sprinkle of glitter if you’re feeling extra magical. Play some enchanting background music to really set the mood, and let the kids choose their favorite magical creature to be while cooking – be it wizards, elves, or even unicorns!
The Alchemy of Fudge-Making
Now, onto the alchemy that is fudge-making. Begin by gathering all your ingredients and equipment. This is a great time to teach the little ones about measuring ingredients and kitchen safety. Lay out the sugar, milk, butter, and of course, the chocolate. For our Magic Fudge Delight, we’re using a mix of dark and milk chocolate to create the perfect balance of richness and sweetness.
Crafting the Concoction
With everything ready, it’s time to start our sweet concoction. While the adults should handle the actual cooking, kids can be involved by checking off the ingredients as you add them to the pot. They can also help stir the sugar and milk before the heat is turned on. Explain to them how sugar dissolves and how heat changes the ingredients as they combine to become something new and magical.
The Transformation
As you carefully stir the mixture over the heat, let the kids watch from a safe distance, explaining how the ingredients meld together to form the fudge. Once it’s time to add the chocolate and marshmallows, have the little ones pour them into the pot (with your guidance). They can then stir the pot with a wooden spoon, feeling like true kitchen wizards as the mixture transforms into a thick, velvety delight.
Spreading the Joy
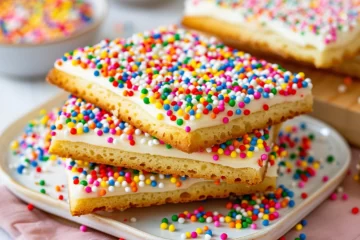
Once your fudge mixture is ready, it’s time to pour it into a lined tray. Here’s where the kids can get really hands-on: let them use a spatula to help spread the fudge evenly (with adult supervision, of course). They can even sprinkle the top with their choice of magical toppings – crushed nuts, rainbow sprinkles, or even edible glitter.
The Magic of Patience
Explain to your little helpers that even in magic, patience is important. As the fudge sets, engage them in cleaning up or crafting labels for your fudge if you plan on sharing it with friends and family. This waiting period is the perfect time to sit down with a book of fairy tales or to draw pictures of magical creatures.
The Grand Reveal
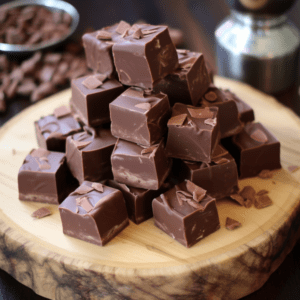
Once the fudge has set, it’s time for the grand reveal. Cut the fudge into squares and let each child have their own piece to taste. Watch their eyes light up with the first bite – there’s nothing quite like the magic of homemade sweets made with love and a dash of fantasy.
Reflecting on the Magic
As you enjoy your Magic Fudge Delight, take the time to talk about what everyone enjoyed most about the process. What did they learn? What would they like to try next time? It’s these moments of reflection that turn a simple recipe into a cherished memory.
Sharing the Magic
If you’ve made more fudge than you can eat, why not spread the magic? Encourage the kids to pack up some of the fudge to share with neighbors, friends, or family. They can decorate the packages and even write little notes to go with them. This act of sharing not only spreads joy but teaches valuable lessons about kindness and generosity.
Capturing the Moment
Before the day ends, make sure to take photos of your magical kitchen adventure. Capture the smiles, the mess, the finished product, and everything in between. These photos will be a sweet reminder of a day well spent and the magic that can be found in everyday moments.
Wrapping Up Our Magical Journey
As our day of fudge-making ends, we’re reminded that cooking with kids is more than just a way to fill the time. It’s a chance to bond, learn, and create magic beyond the kitchen. So here’s to more magical moments, more laughter, and of course, more delicious Milk Chocolate Fudge.
Until our next culinary adventure, keep the magic alive, keep the aprons tied, and never forget – the kitchen is just one spell away from becoming the most enchanting place in the world.
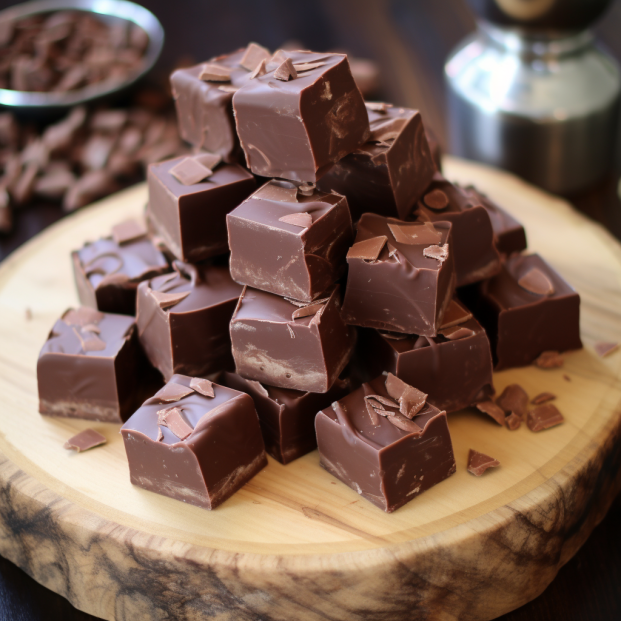
Milk Chocolate Fudge
Equipment
Equipment and Ingredient sections may contain affiliate links to items we use and love.
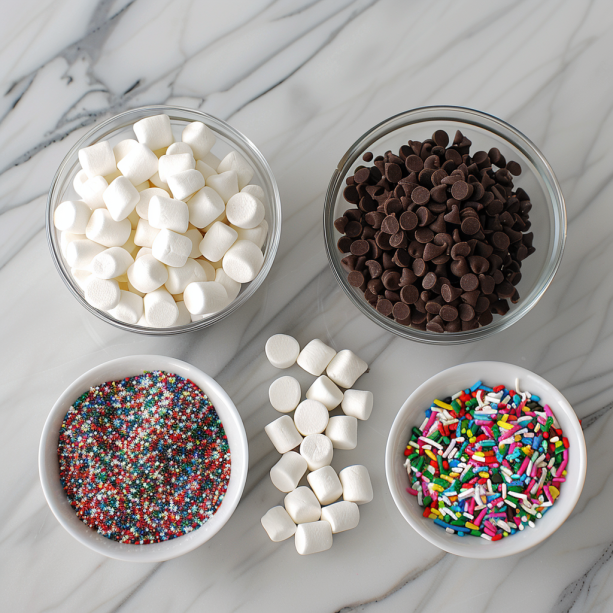
Ingredients
- 3 cups This section may contain affiliate links to products we know and love.mini marshmallows, the fluffy pillows of Fudgetopia!
- 3 cups This section may contain affiliate links to products we know and love.milk chocolate chips, chocolate raindrops!
- 1 14 oz sweetened condensed milk, can
- 1 teaspoon pure vanilla extract, whispers of enchanted forests
- This section may contain affiliate links to products we know and love.Salt, pixie dust
- Optional: Rainbow sprinkles, crushed cookies or nuts for a crunch.
Instructions
- Step 1: Lay out the fairy parchment in the magic square. Let some parchment hang over the sides for easy fudge lifting later.
- Step 2: Pour the liquid gold into the cauldron. Warm it up over medium heat but don’t let it boil.
- Step 3: Add the chocolate raindrops and fluffy pillows. Stir with the wizard’s wand until everything has melted into a pool of chocolaty wonder.
- Step 4: Whisper the enchanted forest secrets (aka add vanilla) and sprinkle the pixie dust (salt). Stir well!
- Step 5: If you’re feeling extra magical, add your choice of rainbow sprinkles, crushed cookies, or nuts.
- Step 6: Pour the mixture into the magic square and smooth the top. Let it cool slightly and then transfer it to the refrigerator.
- Step 7: Wait for 2 hours (or go on a short dragon ride). Once set, use the overhanging fairy parchment to lift the fudge out. Cut into squares and serve.
Notes
The best part about this fudge is the giggles, the hugs, and the delightful memories you make while cooking together. So, here’s to many more magical munchkin moments. Happy baking, dear wizards of the kitchen!
Nutrition
Kitchen Gear and Equipment We Use and Love
I just wanted to let you know that some of the links on this page are affiliate links. This means that if you click on these links and make a purchase, I may earn a small commission at no extra cost to you. Rest assured, I only recommend products and services that I personally use and love. Your support through these links helps me continue to create valuable content and keep this blog running. I appreciate your support!

Kismile Nugget Countertop Ice Maker, Portable Pellet Ice Maker, 35 lbs/Day Chewable Ice, Self-Cleaning,Pebble Ice Maker for Home/Kitchen/Office(Stainless Steel Black)
$179.99 (as of June 29, 2024 19:37 GMT -04:00 - More infoProduct prices and availability are accurate as of the date/time indicated and are subject to change. Any price and availability information displayed on [relevant Amazon Site(s), as applicable] at the time of purchase will apply to the purchase of this product.)
NutriChef 8-Piece Stackable Nonstick Bakeware Set - Premium Steel Baking Tray Set - Includes Round Cake Pan, 6-Cup Muffin Pans, Wide/Square Brownie & Loaf Pans, Cookie Sheet, & Roaster Pan (Black)
$55.50 (as of June 28, 2024 19:26 GMT -04:00 - More infoProduct prices and availability are accurate as of the date/time indicated and are subject to change. Any price and availability information displayed on [relevant Amazon Site(s), as applicable] at the time of purchase will apply to the purchase of this product.)
Igloo Electric Countertop Ice Maker Machine - Automatic and Portable - 33 Pounds in 24 Hours - Ice Cube Maker - Ice Scoop and Basket - Ideal for Iced Coffee and Cocktails - Stainless Steel
$113.99 (as of June 29, 2024 19:37 GMT -04:00 - More infoProduct prices and availability are accurate as of the date/time indicated and are subject to change. Any price and availability information displayed on [relevant Amazon Site(s), as applicable] at the time of purchase will apply to the purchase of this product.)
10mm Straw Topper for Stanley Cup, 6Pcs Cartoon Straw Cover Cap for Stanley Tumbler, Reusable Straw Toppers Stanley Cup Accessories
$5.99 (as of June 28, 2024 19:26 GMT -04:00 - More infoProduct prices and availability are accurate as of the date/time indicated and are subject to change. Any price and availability information displayed on [relevant Amazon Site(s), as applicable] at the time of purchase will apply to the purchase of this product.)