Ice Cream Cone Cake Pops: A Sweet Adventure in the Kitchen
Hello, delightful dessert enthusiasts and mini chefs in training! Today, we embark on a whimsical journey, transforming the classic comfort of cake and the playful joy of ice cream cones into an extraordinary treat: Ice Cream Cone Cake Pops. But this journey is more than just mixing and molding; it’s about creating joy, sharing laughs, and building memories with the little ones in your life.
Table of Contents
Preparing Your Kitchen Wonderland for Ice Cream Cone Cake Pops
Before diving into our dessert crafting, let’s turn the kitchen into a wonderland of culinary creativity. Lay out your cake, frosting, ice cream cones, sprinkles, and melting chocolates. Seeing all the ingredients laid out like a treasure map ignites excitement and sets the stage for the adventure ahead. Invite your kids to explore each component, explaining how they’ll come together to create something magical.
The Heart of the Treat: Crafting the Cake Base
Begin with the heart of our treat – the cake. This is where your little helpers shine. After you’ve crumbled the baked cake into a fine texture, let the children dive in, their fingers becoming the best tools to mix and crumble. There’s something beautifully primitive and bonding over squishing cake between fingers, turning a simple step into a tactile learning experience.
The Magic Bond: Mixing in the Frosting
Now, introduce the magic bond – the frosting. This is the glue that transforms crumbs into a sculptable delight. Let the kids spoon dollops of frosting into the cake crumbs and mix away. Guide them through finding the perfect consistency, not too dry, not too moist, like the sands of a well-built sandcastle. This step isn’t just about mixing; it’s a lesson in textures, consistency, and patience.
Rolling into Fun: Forming the Cake Balls
With your mixture ready, it’s time to roll into fun. Scoop out portions of the cake mix and let the kids roll them into balls. Set up a little station for each child with parchment paper and let them get rolling. It’s like playing with edible clay but with the sweet reward of cake bites at the end. Remind them that each ball represents the top of an ice cream cone, sparking their imagination and attention to detail.
From Cake to Cone: Assembling the Base
Once your cake balls are set, it’s time for assembly. Adults should handle the melting chocolate step, but the kids can help by sticking each cake ball onto the cone using a dab of melted chocolate as adhesive. This is a great moment to teach about adhesion and cooling properties as they watch the chocolate harden and secure the cake to the cone.
Dressing Up: Dipping and Decorating
The most enchanting part for the kiddos is next: dipping and decorating. Once the chocolate is melted and cooled to a safe temperature, assist them in dipping the cake-topped cones into the chocolate, transforming them into ‘ice cream’ tops. Then, let them sprinkle their hearts away, adorning their ‘ice cream’ with colorful toppings. Each child’s cone becomes a canvas, and their creativity is the brush.
The Grand Parade: Setting the Cake Pops
After the cones are dipped and decorated, set them aside to harden. Kids can help by carefully placing them in a stand or on a tray lined with parchment. This moment is perfect for instilling the importance of careful work and the satisfaction of seeing a project come together.
Story Time: Waiting with Tales
As the cake pops chill, settle down for a story or share tales of your own childhood desserts. This downtime becomes a bonding experience, filled with anticipation and shared stories, making the waiting as sweet as a treat.
The Sweet Reveal: Enjoying Your Creations
Once set, unveil the completed Ice Cream Cone Cake Pops. Watch the children’s eyes light up at the sight of their creations, a blend of pride and excitement illuminating their faces. This is the time to celebrate their effort, creativity, and patience.

Reflection and Gratitude: Sharing the Moment
As you all enjoy the fruits of your labor, encourage the kids to share their thoughts on the experience. What was their favorite part? What would they do differently next time? This reflection turns a simple baking project into a memorable learning experience.
Sharing the Sweetness: Spreading the Joy
Encourage your children to share their Ice Cream Cone Cake Pops with family, friends, or neighbors. Teaching them to share their creations fosters a sense of generosity and pride in their work, extending the joy beyond your kitchen.
A Tradition in the Baking: Looking Forward
Conclude your dessert-making adventure by discussing the possibility of making this an annual tradition or exploring new recipes together. Instilling a love for cooking and baking at a young age not only teaches valuable life skills but also creates lasting memories.
Wrapping Up with a Sugar-Coated Bow
Creating Ice Cream Cone Cake Pops with your children is more than just a baking activity; it’s a journey of creativity, learning, and togetherness. Each step, from crumbling to decorating, is an opportunity for lessons, laughter, and love. So here’s to more kitchen adventures, to the bond that grows in the warmth of the oven and the sweetness of shared efforts, and to the endless possibilities that lie within a simple recipe and an afternoon spent together. May your kitchens always be filled with the sweet scent of happiness and the laughter of little ones. Happy baking!

Ice Cream Cone Cake Pops
Equipment
Equipment and Ingredient sections may contain affiliate links to items we use and love.
Ingredients
- 12 mini ice cream cones
- 2 cups of pre-made cake, any flavor of your choice
- 1 cup of frosting, complementing the cake flavor
- 1 cup of melted chocolate or candy melts, for dipping
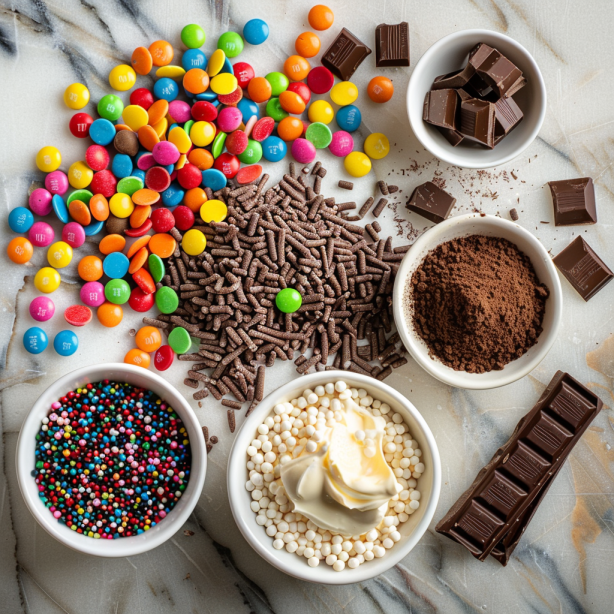
- Sprinkles, mini candies, or any toppings you desire!
Instructions
- Mash & Mix: In a large bowl, crumble the cake until it resembles breadcrumbs. Add in the frosting and mix until it forms a dough-like consistency.
- Shape & Chill: Scoop out a small amount of the cake mixture and shape it into a ball. Place it on top of a mini ice cream cone. Repeat until all cones have cake balls. Place them on a baking sheet lined with parchment paper and chill for 15 minutes.
- Dip & Decorate: Melt the chocolate or candy melts. Dip the cake ball portion of each cone into the melted mixture, ensuring it’s evenly coated. While the coating is still wet, sprinkle your favorite toppings onto it.
- Let it Set: Place the decorated cake pops back on the baking sheet. Let them set for about 20 minutes or until the coating hardens.
Notes
Parents, this is a fantastic opportunity for your kids to let their imagination run wild. From choosing cake flavors to experimenting with toppings, the possibilities are endless! Plus, it’s a great way to introduce them to basic kitchen skills in the most fun way possible. So, baking buddies, are you ready to embark on this delicious journey and create memories that are as sweet as these Ice Cream Cone Cake Pops? Aprons on, creativity unleashed, and let’s get baking! Don’t forget to share your unique creations with us!
Nutrition
Kitchen Gear and Equipment We Use and Love
I just wanted to let you know that some of the links on this page are affiliate links. This means that if you click on these links and make a purchase, I may earn a small commission at no extra cost to you. Rest assured, I only recommend products and services that I personally use and love. Your support through these links helps me continue to create valuable content and keep this blog running. I appreciate your support!

If You Care Parchment Baking Paper Sheets,Roll 70 Sq Ft Roll, Unbleached, Chlorine Free, Greaseproof, Silicone Coated, Standard Size (Fits 13 Inch Pans)
$4.39 (as of June 29, 2024 19:36 GMT -04:00 - More infoProduct prices and availability are accurate as of the date/time indicated and are subject to change. Any price and availability information displayed on [relevant Amazon Site(s), as applicable] at the time of purchase will apply to the purchase of this product.)
TrendPlain 16oz Oil Dispenser Bottle for Kitchen - 2 in 1 Olive Oil Dispenser and Oil Sprayer - 470ml Olive Oil Bottle - Oil Sprayer for Cooking, Kitchen, Salad, Barbecue 2Pcs Black
$8.99 (as of June 27, 2024 19:26 GMT -04:00 - More infoProduct prices and availability are accurate as of the date/time indicated and are subject to change. Any price and availability information displayed on [relevant Amazon Site(s), as applicable] at the time of purchase will apply to the purchase of this product.)
Scrubba Wash Bag Portable Washing Machine - Lightweight Manual Washing Machine for Travel, Camping, Laundry, Baby Clothes - Travel Essentials, Gift - use with Laundry Detergent/Sheets - 5.3 oz.
$55.00 (as of June 29, 2024 19:37 GMT -04:00 - More infoProduct prices and availability are accurate as of the date/time indicated and are subject to change. Any price and availability information displayed on [relevant Amazon Site(s), as applicable] at the time of purchase will apply to the purchase of this product.)
Silonn Ice Maker Countertop, Portable Ice Machine with Carry Handle, Self-Cleaning Ice Makers with Basket and Scoop, 9 Cubes in 6 Mins, 26 lbs per Day, Ideal for Home, Kitchen, Camping, RV
$79.98 (as of June 29, 2024 19:37 GMT -04:00 - More infoProduct prices and availability are accurate as of the date/time indicated and are subject to change. Any price and availability information displayed on [relevant Amazon Site(s), as applicable] at the time of purchase will apply to the purchase of this product.)