Creating Edible Art: Mini Pizza Faces
In the heart of every home kitchen lies the potential for creativity, connection, and culinary delights. This is especially true when it comes to cooking with kids. Today, we’re not just making food; we’re creating edible art with our Mini Pizza Faces. This activity is perfect for a weekend project, a playdate, or a unique way to celebrate a special occasion. So, grab your aprons, gather your little artists, and let’s embark on a flavorful journey of creativity and fun!
The Canvas and the Paints
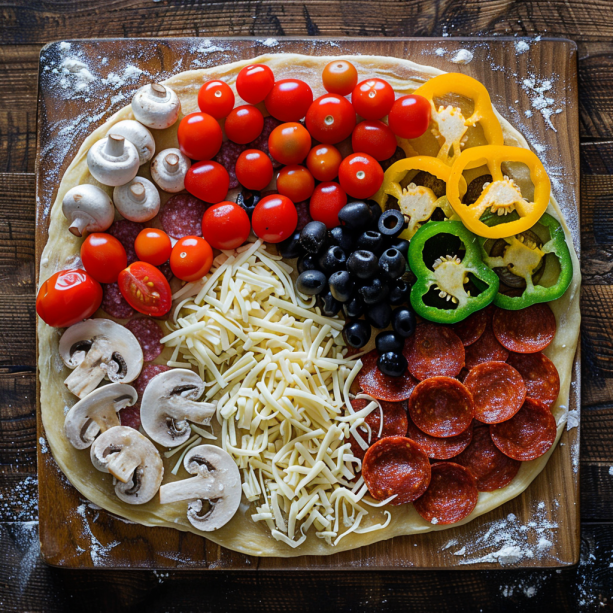
Our canvas today is the humble English muffin, split into halves to create a perfect round base for our portraits. Think of each half as a blank slate ready to be transformed into a masterpiece with the vibrant colors and textures of our ingredients. For our paints, we have tomato sauce, a variety of cheeses, sliced vegetables, pepperoni, olives, and anything else your pantry has to offer that can add color, flavor, and fun to our creations.
Preparing the Studio
Just like any great artist, preparation of your workspace is key. This step is a fantastic opportunity to involve the kids in setting up the kitchen or “studio.” Let them help you lay out all the ingredients in small bowls, arrange the English muffin halves on a baking sheet, and get the oven preheated. This not only makes them feel involved from the very beginning but also teaches them about organization and the importance of mise en place in cooking.
Crafting Your Masterpieces
Now, the real fun begins. Give each child a few English muffin halves and let their imaginations run wild. Show them how to spread a thin layer of tomato sauce on each muffin half as the background for their portraits. Then, guide them in creating faces using the ingredients. Sliced olives or mushrooms can become eyes, strips of bell pepper can form smiles, and shredded cheese can turn into curly hair.
This part of the process is not just about making a tasty treat; it’s a moment to encourage creativity, decision-making, and fine motor skills. As they craft their portraits, children will naturally experiment with different facial expressions and features, making each pizza portrait unique.
The Transformation into Mini Pizza Faces
With the portraits crafted, it’s time for the magical transformation in the oven. As the pizzas cook, the cheese melts into a deliciously gooey canvas, securing all the facial features in place. This cooking step is a chance to teach patience and anticipation. Let the kids watch the transformation through the oven window, turning this wait into an exciting part of the process.
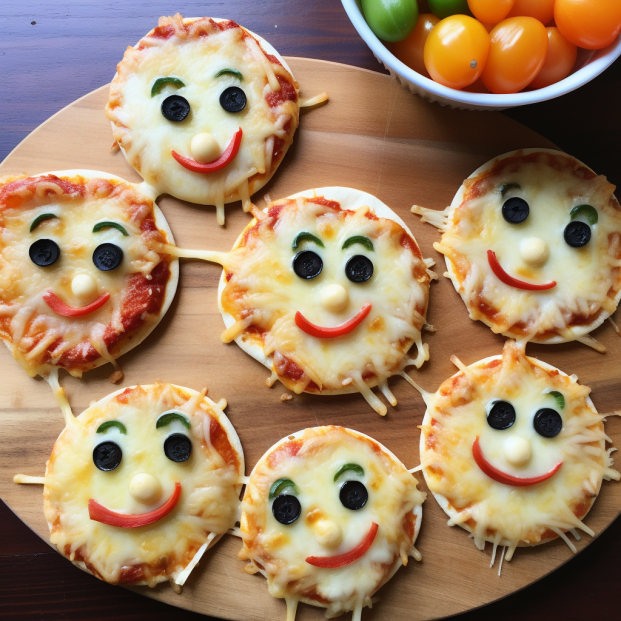
The Grand Exhibition
Once the pizzas are done, it’s time for the grand exhibition. Arrange the mini pizza faces on a platter and let everyone admire the collection of edible art. This is a moment of pride for the young chefs, seeing their creations come to life and ready to be enjoyed.
A Culinary and Artistic Adventure
Gathering around the table to taste these masterpieces, share what inspired each portrait, and talk about the experience adds depth to this culinary adventure. It’s a time to bond, share laughs over the whimsical designs, and enjoy the delicious results of your creative efforts.
Conclusion: More Than Just a Meal
Creating Mini Pizza Faces with your kids is more than just making a meal; it’s an opportunity to connect, teach, and inspire. It turns the kitchen into a studio where art and food merge into a memorable experience. By involving kids in the cooking process, they learn more than just how to prepare food; they learn about creativity, the joy of cooking, and the importance of family time.
So, the next time you’re looking for a fun and engaging activity, remember that your kitchen holds all the ingredients for a fantastic artistic adventure. Who knows what masterpieces you and your little chefs will create next on your culinary canvas?

Mini Pizza Faces
Equipment
Equipment and Ingredient sections may contain affiliate links to items we use and love.
Ingredients
- 1 package of pre-made pizza dough, or homemade if you’re up for it!
- 1 cup pizza sauce, store-bought or homemade
- 2 cups This section may contain affiliate links to products we know and love.Shredded Cheese
- Toppings:
- This section may contain affiliate links to products we know and love.Cherry Tomatoes, for rosy cheeks or noses
- This section may contain affiliate links to products we know and love.Black Olives, for eyes or hair
- This section may contain affiliate links to products we know and love.Bell Pepper, for colorful hair or clothes
- This section may contain affiliate links to products we know and love.Mushrooms, for ears or hats
- Pepperoni or salami, for smiles or details
- Fresh basil or spinach, for backgrounds or greenery
- This section may contain affiliate links to products we know and love.Olive Oil, for brushing
- This section may contain affiliate links to products we know and love.Salt and Pepper
Instructions
- Preheat & Roll: Preheat your oven to 475°F (245°C). While it’s warming up, roll out your pizza dough and use a large round cookie cutter or a glass to cut out mini pizza bases.
- Top It Up: Place the mini pizza bases on a baking tray lined with parchment paper. Spread a generous spoon of pizza sauce on each, leaving a small border around the edge.
- Cheesy Canvas: Sprinkle mozzarella cheese on each mini base. Now, here comes the fun part! Let your child create their pizza portrait using the toppings. Maybe those cherry tomatoes become cute rosy cheeks, or those olives become twinkling eyes.
- Bake: Pop the tray into the oven and bake for 10-12 minutes or until the edges are golden and the cheese is bubbly and slightly browned.
- Serve & Admire: Once done, carefully remove from the oven and let cool for a few minutes. Admire your child’s pizza masterpiece before digging in!
Notes
Nutrition
Kitchen Gear and Equipment We Use and Love
I just wanted to let you know that some of the links on this page are affiliate links. This means that if you click on these links and make a purchase, I may earn a small commission at no extra cost to you. Rest assured, I only recommend products and services that I personally use and love. Your support through these links helps me continue to create valuable content and keep this blog running. I appreciate your support!

Iceman Dual-Size Ice Maker Countertop - Portable Ice Machine, Large and Small Ice Machine Maker with Self Cleaning, 9 Cubes in 7 Mins, 22lbs/24hrs, for Home, Kitchen, Office, Party, Ice Scoop Included
$89.99 (as of July 3, 2024 20:42 GMT -04:00 - More infoProduct prices and availability are accurate as of the date/time indicated and are subject to change. Any price and availability information displayed on [relevant Amazon Site(s), as applicable] at the time of purchase will apply to the purchase of this product.)
SURETIVIAN Chicken Shredder Large Chicken Breast Shredder Tool Twist with Brush&Fork, Visible Meat Shredder Machine, Anti-Slip Strip, Ergonomic Handle, BPA Free, Pork Beef Chicken(Mint Green)
$19.99 (as of July 2, 2024 20:16 GMT -04:00 - More infoProduct prices and availability are accurate as of the date/time indicated and are subject to change. Any price and availability information displayed on [relevant Amazon Site(s), as applicable] at the time of purchase will apply to the purchase of this product.)
ecozy Portable Countertop Ice Maker - 9 Ice Cubes in 6 Minutes, 26 lbs Daily Output, Self-Cleaning with Ice Bags, Scoop, and Basket for Kitchen, Office, Bar, Party - Black
$89.99 (as of July 4, 2024 20:46 GMT -04:00 - More infoProduct prices and availability are accurate as of the date/time indicated and are subject to change. Any price and availability information displayed on [relevant Amazon Site(s), as applicable] at the time of purchase will apply to the purchase of this product.)
TrendPlain 16oz Olive Oil Dispenser for Kitchen - 2 in 1 Olive Oil Dispenser and Oil Sprayer - Olive Oil Dispenser Bottle w/Stickers - Olive Oil Sprayer for Cooking Black (Light Blockage)
$9.99 (as of July 2, 2024 20:16 GMT -04:00 - More infoProduct prices and availability are accurate as of the date/time indicated and are subject to change. Any price and availability information displayed on [relevant Amazon Site(s), as applicable] at the time of purchase will apply to the purchase of this product.)